Tender Build
Ever since aquiring Dawn I have wanted a tender that would be more in keeping with the boat. The old tender, a Ribeye 2.4 was very functional and a good tender in its own right - inflatable tubes with a rigid aluminium hull. But, at 2.4m in length it didn't fit on the deck of Dawn and had to be towed behind. Always a potential liability. In addition it wasn't very nice to row, been slow and directionally unstable due to the seating position of the occupant.
When I came to Wearde Quay last year I met the volunteers who were working on Tectona at the quay prior to Tectona being surveyed out of the water (dryed out). One of them I stayed in touch with over the winter and she sent me a message a few weeks ago asking about my current tender as she had heard I was looking for something different. Through her I got in touch with Ben who runs Weir Quay, further up the River Tamar and where Tectona is normally berthed.
Ben and I had a very quick look around the internet to see if anything was available and after not seeing much, I suggested that if Ben knew a source of marine ply and if he had suitable space at his yard I could build a new tender. This we agreed upon, in exchange for my Ribeye 2.4 I would have workshop space, plus all the materials and use of any larger power tools required. Deal.
Fortuitously at the same time I had use of a vehicle. This allowed me to drive from Wearde Quay to Weir Quay each day over the course of twelve days.
I had found free plans online through the Duckworks website for 'ApplePie', a seven foot pram style tender. Using in the main two sheets of 1/4" ply, a little 3/4" ply and some hardwood. Stitch & Glued with epoxy.
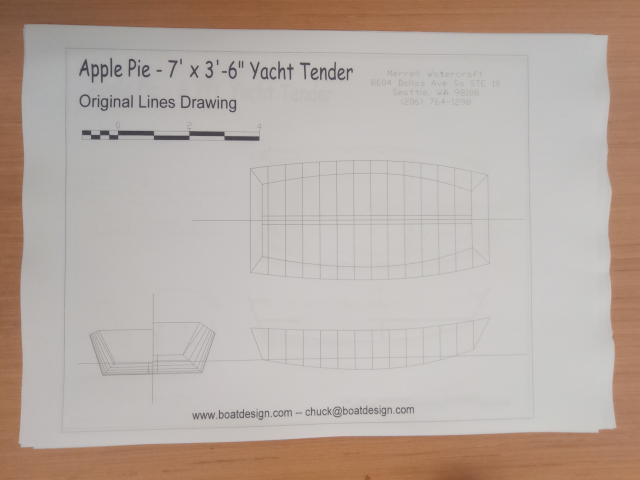
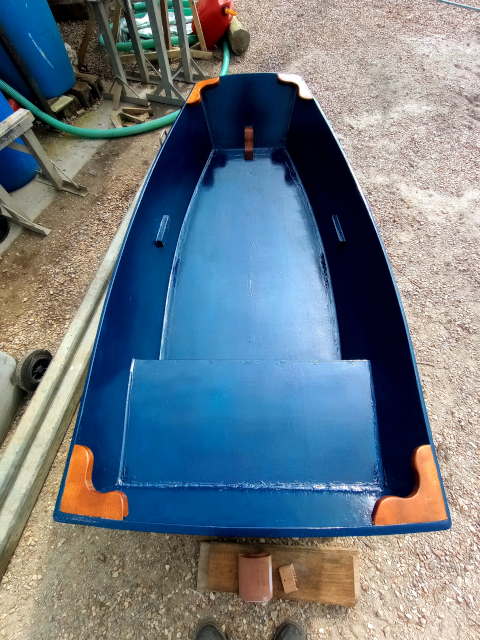
The plan as is I modified slightly to make the bow transom slightly narrower and the tender less of a box shape, I incorporated a sealed buoyancy tank in the stern which can also act as a seat, included only one rowing position in the short term with a moveable bench seat for when I establish the, actual, best rowing position for both solo and with load rowing.
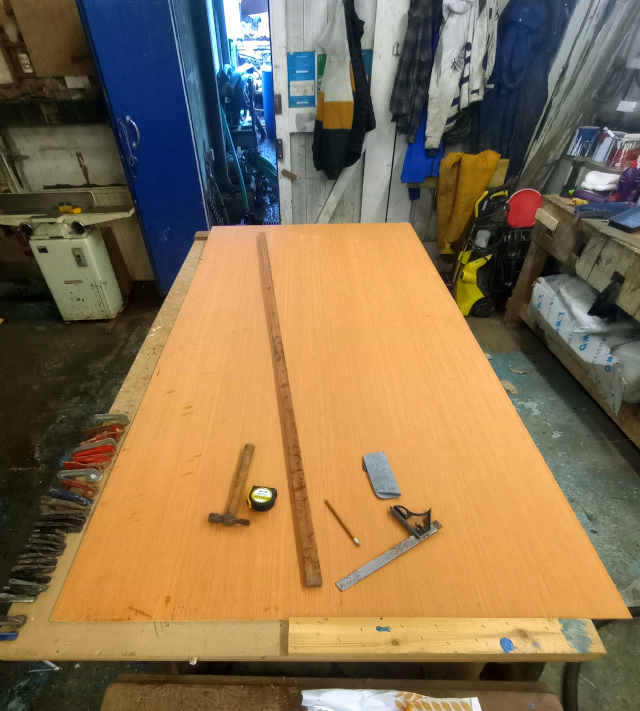
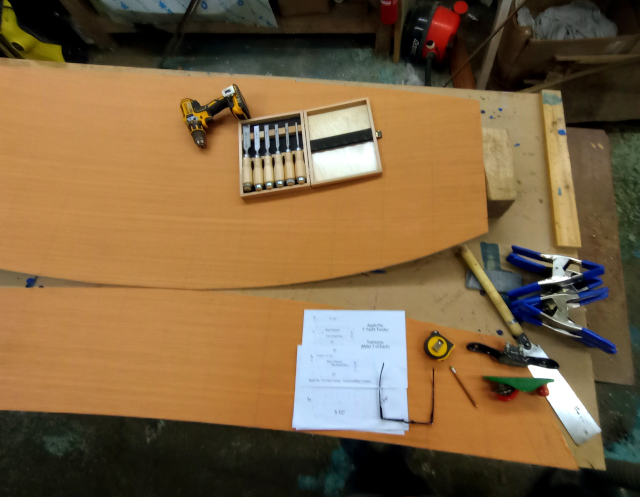
Lofting took a couple of hours and by the end of day one I had the three main panels plus both transoms cut and ready for the next step. The following day I drilled the joining edges and loosely stitched together the panels (with some adjustments to the transoms) to get a loose but good fit. Snugged up the cable-ties I was using as stitches and mixed up a pot of thickened epoxy to lay in some fillets between stitches. This epoxy would set up overnight and allow me to remove the stitches on the next day.
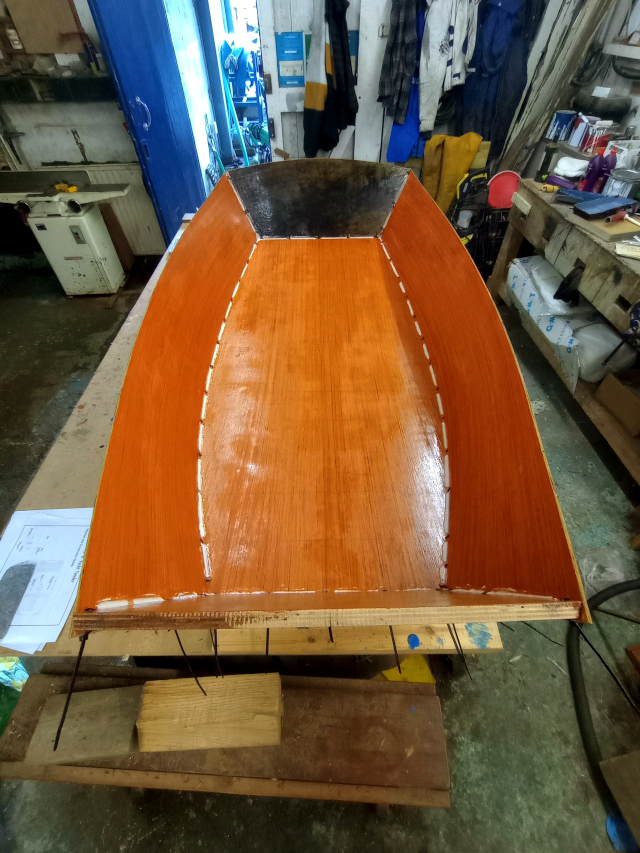
After removing the stitches I spent the day mixing batches of epoxy to fillet all the internal seams of the hull and then cut and lay over four inch wide strips of glass cloth to reinforce those seams, wetting this out with unthickened epoxy.
I should say here that I have never built a boat, canoe or anything using this method of construction or anything similar previously. I've made canoe paddles, canoe poles and wannigans; I've repaired holes in GRP yachts using epoxy - so these experiences came in useful. The *Stitch & Glue* method was known to me from anecdotal sources only, and I used that knowledge to proceed.
Progress was made quite quickly, with the only pauses due to having to wait for epoxy to cure.
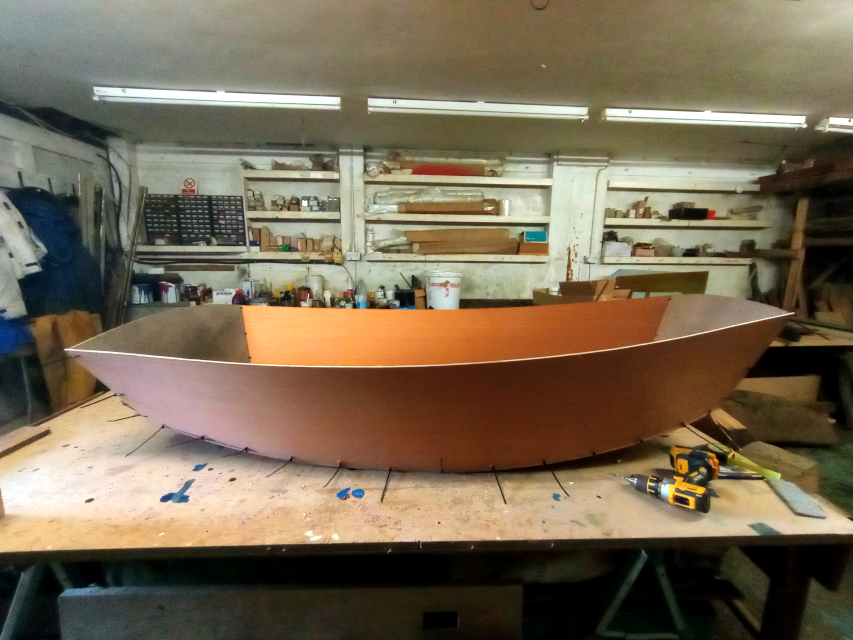
Once the inside of the hull was taped I gave the exposed wood a coat of epoxy. Then turned the hull over. I faired in all the external edges where they met and then epoxy taped all these same edges and coated exposed wood, just the same as the internal surfaces.
I now had something that actually looked like it should, would float, and was watertight if it were placed in the water…
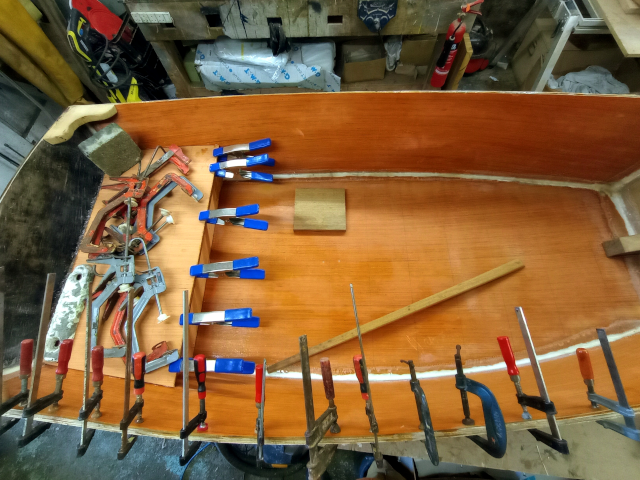
Next, was to figure out what I wanted for the internal layout. Buoyancy, seating, rowlock position etc and also whether to use solid wood or laminated ply strips for the gunnels. With the help of a fellow boat-owner in the yard I managed to get the very flexible pieces of remaining 8' x 4' 1/4" ply sheets onto and through the table-saw and produced a half dozen 1 1/4" strips to use for the gunnels.
Starting on a fresh day I collected as many clamps as I could find, mixed up some thickened epoxy and began to get the gunnels in place - one strip at a time. A slippery and not easy task. The gunnels took up a couple of days as I glued and clamped each strip one at a time - with only enough clamps for one strip at a time…
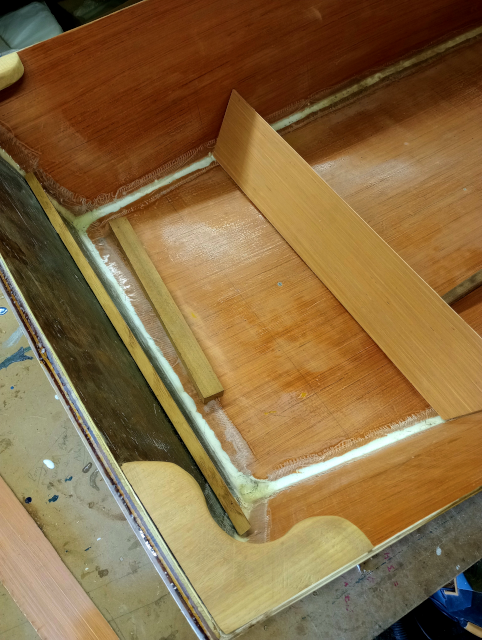
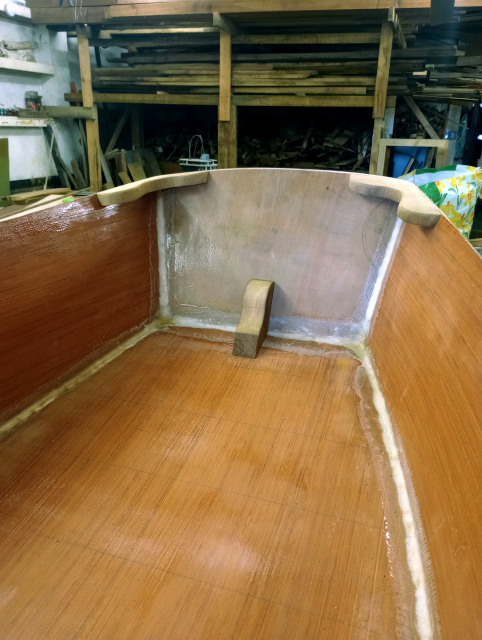
Using the plans to some extent, various bits of scrap wood, a laser level, a straight edge and tape-measure I spent some time working out the position of the buoyancy chamber in the stern and created some cardboard templates, cut some oversized pieces of ply. Fitting these through a process of slowly taking off more of the edges using a japanese saw and block plane until they fit at the position pencilled in the hull. A supporting under frame was created for the seat that would allow the future installation of a watertight hatch if wanted without the risk of cutting through any framing. A dry fit was done, it all seemed good - just the odd <5mm gap which could be filled with the epoxy fillet when applied.
Next day I built the buoyancy chamber, gluing in all the framing and then the front panel. Filleting the inside seams and giving a second coat of epoxy to all the inside surfaces. Next I glued and screwed on the seat panel and filleted the external seams, again coating any unsealed wood with epoxy. Result a watertight chamber that should have more than enough reserve buoyancy to keep both tender and occupant afloat if swamped in a rough sea.
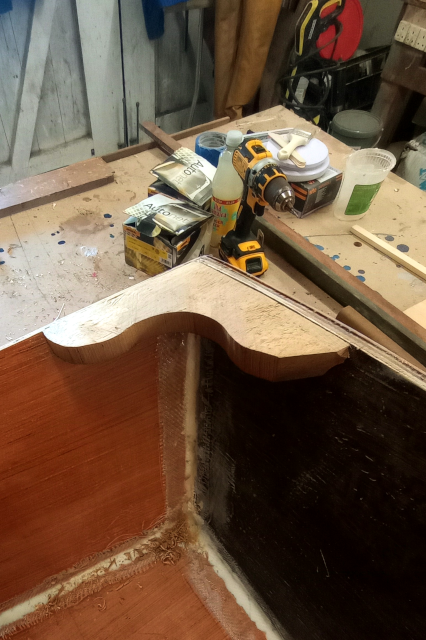
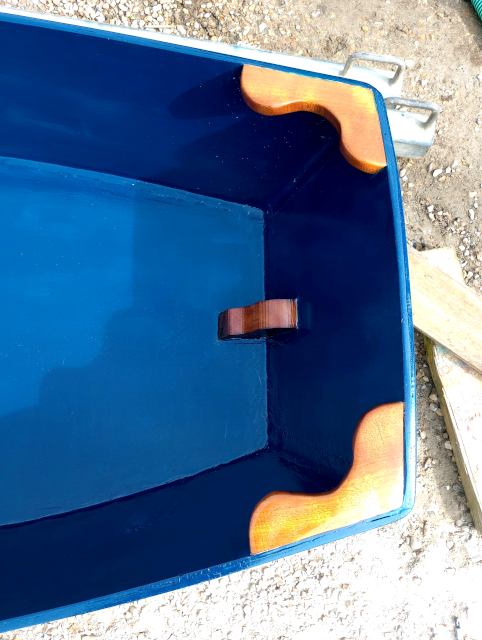
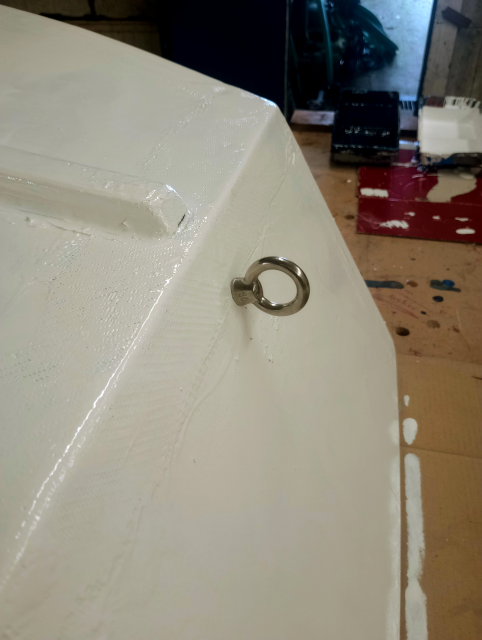
The bulk of the build was done now. I made some quarter knees from a nice piece of scrap Iroko and from the waste made a bow transom knee to take the towing eye.
The knees were screwed and glued in place after shaping the double bevels to give a good fit between them and the inside corners of the hull. An enjoyable process from a wedge of wood to slices of iroko, to nicely curved knees, use of the bevel guage and band-saw to fit to the hull and final installation.
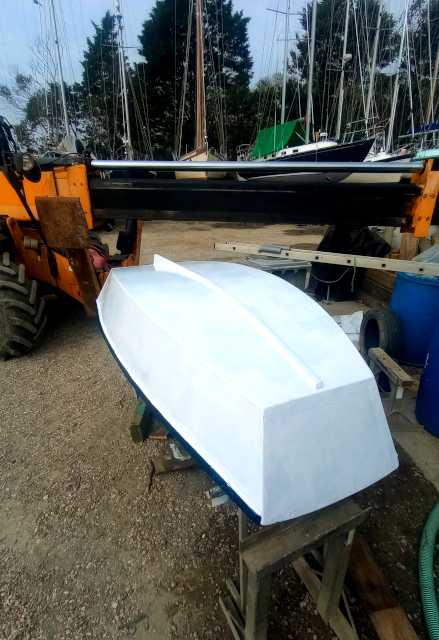
With all the woodwork done, excepting the skeg and keel, I now applied a coat of primer to the inside and outside of the tender after a workman like sanding of all lthe glass-tape edges. As this tender is not an exhibition piece I sanded smooth, but didn't spend time filling with fairing compound and more sanding to completely hide the glass cloth weave. The resin and paint would fill the majority of the weave.
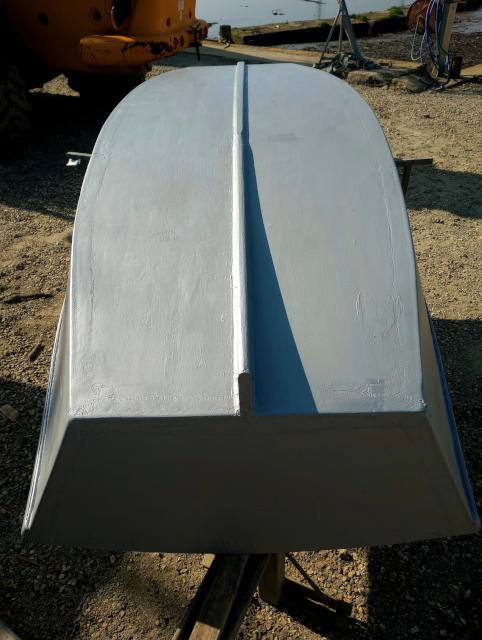
With the tender upside down I glued and screwed the Skeg and Keel strips on, filleting along their length. Considered fitting a Brass keelband, and decided this could be done later if wear on these parts dictated.
After a second coat of primer I applied two coats of topcoat paint, Dark Blue internally and White externally. Choice of colour dictated by what was available in the paint store at the yard. Applied a Varnish/Oil mix to the quarter knees and towing knee, the mounting blocks for rowlocks and the outboard bracket. Painted the bench seat in white to contrast with the hull.
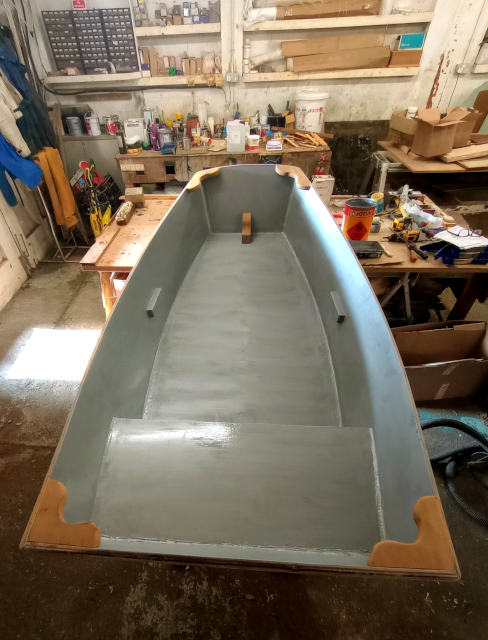

The last job was to find rowlocks and mounting pintles. I tried a top mounted galvanised pintle but decided this was not ideal and elected for side mounted brass pintles and rowlocks. These look and work really well with the small diameter loom oars I already pocessed. I tied Turks Head knots on the oars to help in locating the rowing position, and will also leather the oars at the point they sit in the rowlocks to prevent wear on the looms.
Ben, from Weir Quay brought the tender down river on his workboat for me late evening and we incongruously launched it over the rail as the light faded. It floated. And was left tied to my boat overnight.
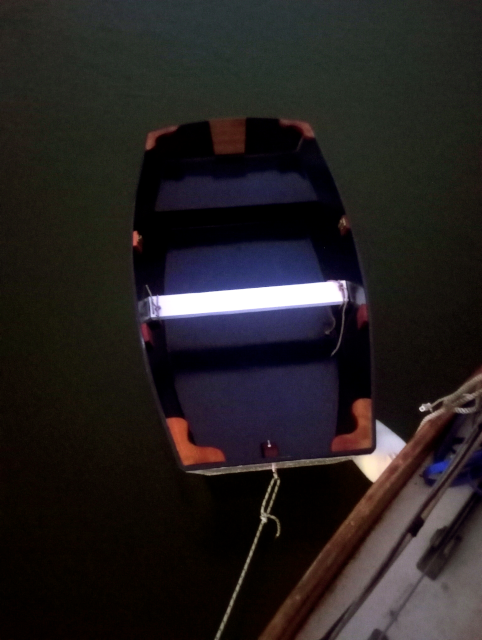
Next morning I made the first journey. The tender was tender, but I guessed I would get used to that over time. I rowed around my boat, over to Tectona and back. A successful trip, I was still dry.
The rowing position was a little too far back and close to the rowlocks, I may move this apart, but after some use I am adapting to where it is… I've gotten used to the tenderness as expected and my new tender is proving well worth the effort it took to build.
Most importantly of all, it fits perfectly over the Butterfly hatch and sits really well in that position, keeping my side decks clear for access; it is light at around 50 lbs, easy to pull up on deck by hand and to relaunch without recourse to a halyard etc. I can carry it on a shoulder up/down the beach if required; it rows fast and true.
I'll soon be naming the tender, and identifing it as the t/t Dawn.